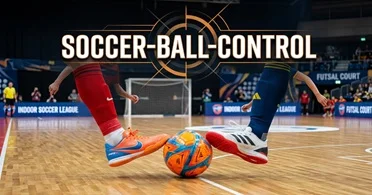

Soccer shooting is the skill of striking the ball toward the goal with enough accuracy, power, control, and timing to create a scoring opportunity. Good shooting is not simply about kicking the ball hard. It combines body position, support-foot placement, striking technique, balance, ball contact, and decision-making.
Whether you are a beginner learning how to shoot a soccer ball or an experienced player trying to improve shooting power and accuracy, mastering a few fundamental techniques can make your finishing much more consistent.
What Is Soccer Shooting?
Soccer shooting is the act of deliberately striking the ball toward the opponent’s goal, usually with the intention of scoring.
A successful shot depends on several factors:
- Accuracy — directing the ball toward the intended target
- Power — generating enough ball speed to beat the goalkeeper
- Technique — choosing the correct part of the foot and ball
- Balance — controlling the body before, during, and after contact
- Timing — striking the ball at the right moment
- Body position — keeping the head, hips, shoulders, and support foot coordinated
- Decision-making — selecting the appropriate type of shot for the situation
The hardest shot is not always the best shot. A controlled, well-placed finish can be more effective than simply trying to hit the ball as hard as possible.
Soccer Shooting Fundamentals
Before learning different shooting techniques, build a consistent basic shooting position.
1. Approach the Ball at a Controlled Angle
Your approach affects how naturally you can swing the kicking leg.
For a basic instep shot, approach the ball at a slight angle rather than running directly straight at it. Your final steps should help you get your body into a balanced position.
Avoid taking too many fast steps immediately before shooting. A controlled approach makes it easier to place the support foot correctly.
2. Place the Support Foot Beside the Ball
The support foot is the non-kicking foot. It provides the base that allows the kicking leg to swing freely.
For a basic stationary shot, a useful starting point is approximately:
6–10 inches (15–25 cm) beside the ball.
The exact distance varies according to your body size, stride, ball position, and shooting technique.
The support foot should be close enough to provide stability but not so close that it restricts the kicking leg.
3. Keep the Support Foot Generally Pointed Toward the Target
For a basic shot, point the support-foot toes generally toward the intended target.
This does not mean the foot must always be perfectly straight. A small outward angle is natural, and the ideal position changes with the technique and approach.
The important thing is that the support foot provides a stable base and helps keep the body aligned with the intended shot.
4. Keep Your Head and Eyes on the Ball
Look at the ball during the striking phase.
Before the shot, you can look at the target to decide where you want the ball to go. As you prepare for contact, shift your attention back to the ball.
This helps you make cleaner contact and avoid striking the ball inconsistently.
5. Keep the Planting Knee Slightly Flexible
A completely locked support leg can make the movement stiff.
A slightly flexed support knee helps maintain balance and allows the body to adjust naturally during the shot.
6. Lean Your Body According to the Desired Trajectory
Your upper-body position affects the trajectory of the ball.
For a basic driven shot, keeping the chest relatively over the ball can help produce a lower trajectory.
Leaning too far backward can contribute to a higher shot, while excessive forward lean can make it difficult to generate the desired trajectory.
The correct position depends on the type of shot you are attempting.
7. Strike Through the Ball
Do not think only about making contact.
Think about the path of the kicking leg through the ball.
A controlled follow-through helps transfer momentum and maintain balance after contact.
How to Shoot a Soccer Ball With Power and Accuracy
Power and accuracy are not separate skills. Good shooting technique allows you to generate speed without losing control.
Use this basic sequence:
Step 1: Look at the Target
Identify the area of the goal you want to hit before beginning the final shooting movement.
Step 2: Take a Controlled Approach
Use a comfortable approach angle and avoid rushing the final step.
Step 3: Plant the Support Foot
Place the non-kicking foot approximately 6–10 inches (15–25 cm) beside the ball as a starting reference.
Step 4: Lock the Kicking Ankle
For an instep power shot, keep the ankle firm so the foot provides a stable striking surface.
Step 5: Strike With the Correct Part of the Foot
For a powerful driven shot, use the instep/laces area rather than the toes.
Step 6: Keep Your Body Balanced
Keep the torso controlled and avoid falling backward during contact.
Step 7: Follow Through
Allow the kicking leg to continue naturally toward the intended direction.
Step 8: Recover Quickly
After the shot, regain balance so you can react to a rebound, deflection, or counterattack.
What Part of the Foot Should You Use to Shoot?
The correct contact area depends on the type of shot.
| Contact area | Common use |
| Instep/laces | Power and driven shots |
| Inside of the foot | Accuracy and controlled placement |
| Outside of the foot | Curved or outside-foot shots |
| Toe area | Quick shots when there is little space or preparation |
| Lower/under part of the ball | Lofted shots and chips |
The contact surface should match your intended result. Trying to use the same foot contact for every type of shot limits your options.
Types of Shooting in Soccer
Players use different shooting techniques depending on the position of the ball, available space, goalkeeper position, and desired trajectory.
Common types include:
- Instep or power shot
- Inside-foot placement shot
- Curled shot
- Outside-foot shot
- Chip
- Volley
- Half-volley
- First-time shot
- Low driven shot
- Toe-poke finish
Instep or Power Shot
The instep power shot is one of the fundamental soccer shooting techniques.
It uses the laces or instep area of the foot to produce a firm, relatively direct strike.
Basic technique
- Approach the ball under control.
- Plant the support foot beside it.
- Keep the support foot generally directed toward the target.
- Keep the kicking ankle firm.
- Strike through the center area of the ball for a driven trajectory.
- Follow through toward the target.
Support-foot starting position
- Distance: approximately 6–10 inches (15–25 cm)
- Toe direction: generally toward the target, often around 0–15° outward
These are starting references rather than strict measurements.
Inside-Foot Placement Shot
The inside of the foot provides a larger contact surface, making it useful when accuracy is more important than maximum power.
This technique is commonly used for controlled finishes into open areas of the goal.
Basic technique
- Approach the ball under control.
- Place the support foot beside the ball.
- Open the striking foot.
- Contact the ball with the inside of the foot.
- Keep the movement controlled.
- Direct the follow-through toward the intended target.
Support-foot starting position
- Distance: approximately 4–8 inches (10–20 cm)
- Toe direction: generally toward the target, around 0–10° outward
The exact position changes depending on the angle of the shot.
Curled Soccer Shot
A curled shot is designed to make the ball bend through the air.
The player generally contacts the ball away from its center using the appropriate part of the foot and creates spin that influences the ball’s flight.
Basic technique
- Approach from a suitable angle.
- Plant the support foot beside the ball.
- Strike the appropriate side of the ball.
- Use the inside of the foot for a common curling technique.
- Allow the kicking leg to follow through across the intended path.
Support-foot starting position
- Distance: approximately 6–10 inches (15–25 cm)
- Toe direction: commonly around 10–30° according to the approach and intended curve
The exact angle should not be treated as a fixed rule.
Outside-Foot Shot or Trivela
An outside-foot shot uses the outside of the kicking foot to contact the ball.
It can produce a different type of spin and trajectory and can be useful when the body position makes an inside-foot strike less convenient.
Basic technique
- Approach the ball from a suitable angle.
- Plant the support foot beside or slightly to the side of the ball.
- Keep the ankle firm.
- Contact the ball with the outside of the foot.
- Follow through naturally rather than forcing the movement.
Support-foot starting position
- Distance: approximately 5–10 inches (13–25 cm)
- Toe direction: commonly around 10–30° depending on the approach angle
The player’s body position and ball location have a major effect on the final foot position.
Chip Shot
A chip is used to lift the ball over an approaching goalkeeper or another obstacle.
Instead of driving directly through the center of the ball, the player gets the foot underneath the ball to create a higher trajectory.
Basic technique
- Keep your approach controlled.
- Plant the support foot close enough for balance.
- Get the striking foot underneath the ball.
- Use a controlled upward striking action.
- Adjust the amount of lift according to the situation.
Support-foot starting position
- Distance: approximately 5–8 inches (13–20 cm)
- Toe direction: generally toward the target with a small outward angle
First-Time Shooting
A first-time shot is taken immediately without taking an additional controlling touch.
It is especially useful when a quick finish is more effective than stopping the ball.
The key challenge is getting the support foot into position quickly.
Support-foot starting position
- Distance: approximately 4–10 inches (10–25 cm) from the expected contact point
- Toe direction: generally toward the intended target
Because the ball is moving, the actual position may change significantly from one attempt to another.
Volley
A volley is struck while the ball is airborne before it reaches the ground.
The main challenge is timing.
Basic technique
- Track the ball carefully.
- Move into the expected contact area.
- Position the support foot according to where contact will occur.
- Keep the body balanced.
- Strike the ball cleanly.
- Recover quickly after the attempt.
Support-foot position
The support foot is normally positioned according to the expected contact point rather than a fixed distance from a stationary ball.
As a general starting reference, it may be around 6–12 inches (15–30 cm) from the expected contact area.
Half-Volley
A half-volley is struck immediately after the ball bounces.
Because the ball changes height and speed after bouncing, the player must adjust quickly.
The support foot should move beside the expected bounce/contact point rather than being placed at a predetermined location.
A useful starting reference is approximately 5–10 inches (13–25 cm) from the expected contact point.
Toe-Poke Finish
A toe poke uses the front/toe area of the foot to make quick contact with the ball.
It can be useful when a player has very little time or space to complete a full shooting motion.
It is generally less about producing a technically elegant swing and more about getting a rapid shot away.
Technique-Specific Support-Foot Positions
The support foot does not have exactly the same position for every type of shot. Its distance from the ball, toe direction, and body alignment can change according to the intended contact and trajectory.
| Shooting technique | Support-foot distance | Approximate toe direction | Main purpose |
| Instep/power shot | 6–10 in (15–25 cm) beside the ball | Generally toward target, about 0–15° outward | Stable base for a firm forward strike |
| Inside-foot placement | 4–8 in (10–20 cm) beside the ball | Toward target, about 0–10° outward | Control and directional accuracy |
| Curled shot | 6–10 in (15–25 cm) beside the ball | Often 10–30°, depending on approach | Allows the hips and kicking leg to rotate |
| Outside-foot shot | 5–10 in (13–25 cm) beside the ball | Often 10–30°, depending on approach | Creates space for outside-foot contact |
| Chip | 5–8 in (13–20 cm) beside the ball | Generally toward target with a small outward angle | Supports the upward striking action |
| First-time shot | 4–10 in (10–25 cm) from expected contact | Generally toward target | Provides a quick stable base |
| Volley | 6–12 in (15–30 cm) from expected contact | Adjusted toward intended target | Helps maintain balance during airborne contact |
| Half-volley | 5–10 in (13–25 cm) from expected bounce/contact | Generally toward target | Helps the player adjust to the bounce |
A Useful Rule
Think of the support foot as the anchor for the shot.
It should provide enough stability and space for the kicking leg to move freely, but its exact position should adapt to the ball’s location and the technique being used.
For beginners, first learn to consistently place the support foot beside the ball. Once that becomes natural, adjust its position according to the type of shot.
Soccer Shooting Form
Good soccer shooting form is a combination of several movements rather than one isolated action.
A basic shooting sequence looks like this:
Approach → Plant → Balance → Swing → Contact → Follow-through → Recovery
Approach
Control your final steps and prepare your body for the strike.
Plant
Place the support foot in a stable position beside or near the expected contact point.
Balance
Keep your torso and support leg controlled.
Swing
Bring the kicking leg through a natural movement rather than trying to force it.
Contact
Use the correct part of the foot and the appropriate area of the ball.
Follow-through
Continue the kicking motion after contact.
Recovery
Regain balance and prepare for the next action.
How to Improve Soccer Shooting Accuracy
Accuracy improves when you consistently practice controlled contact and target selection.
Try these principles:
Pick a Specific Target
Instead of simply aiming for the goal, choose a particular area such as:
- Bottom corner
- Far post
- Near post
- Upper corner
- Area just beyond the goalkeeper
Start With Controlled Power
Do not immediately attempt maximum power.
Start with a speed that allows you to consistently hit your intended target.
Then gradually increase power while maintaining accuracy.
Practice Both Feet
Being able to finish with either foot gives you more options during a match.
Vary Your Shooting Angles
Practice from central positions as well as different angles around the penalty area.
Practice Under Movement
Once stationary shooting becomes comfortable, introduce passes, touches, movement, and defenders or other realistic constraints.
How to Improve Shooting Power
Power comes from coordinated movement rather than simply swinging the lower leg as hard as possible.
Focus on:
- A controlled approach
- A stable support foot
- A firm ankle
- Clean ball contact
- Coordinated hip and leg movement
- A natural follow-through
- Good balance
Avoid sacrificing accuracy just to increase shot speed.
A powerful shot that misses the target is often less useful than a controlled shot directed into a difficult area for the goalkeeper.
5 Steps of Shooting a Soccer Ball
For beginners who want a simple process, remember these five steps:
- Approach the ball under control.
- Plant the support foot beside the ball.
- Prepare the kicking leg and keep the ankle appropriately firm.
- Strike the ball with the correct part of the foot.
- Follow through and regain balance.
Once these movements become automatic, you can add more advanced techniques.
Soccer Shooting Drills
The best shooting drills should develop different parts of the skill rather than repeatedly performing exactly the same shot.
1. Stationary Target Shooting
Place targets inside the goal and shoot from a short distance.
Focus on accuracy rather than maximum power.
Goal: Improve contact and placement.
2. One-Touch Shooting Drill
Have a partner pass the ball toward you and finish with one touch.
Goal: Improve first-time finishing.
3. Dribble and Shoot
Dribble toward the penalty area before taking a shot.
Goal: Combine ball control with finishing.
4. Receive, Turn, and Shoot
Receive the ball with your back to goal, turn, and finish.
Goal: Improve shooting after a change of direction.
5. Angle Shooting Drill
Take shots from different positions around the penalty area.
Goal: Learn how body position changes the shooting angle.
6. Weak-Foot Shooting
Repeat controlled finishing exercises with your weaker foot.
Goal: Develop two-footed finishing ability.
7. Moving-Ball Shooting
Have a partner roll or pass the ball into your path before you shoot.
Goal: Improve timing and support-foot placement.
8. Rebound Shooting
Take a shot, react to the rebound, and attempt a second finish.
Goal: Improve reaction speed and finishing under pressure.
Soccer Shooting Drills for Kids
Young players should focus on technique and enjoyment rather than maximum shooting power.
Good beginner drills include:
- Target shooting
- Short-distance placement
- Dribble and shoot
- Pass-and-shoot
- One-touch finishing
- Weak-foot practice
- Shooting games
- Moving-ball finishes
For younger players, use age-appropriate distances and equipment so they can practice the movement successfully.
The goal is to develop consistent technique before increasing the difficulty.
Soccer Shooting Drills for 7-Year-Olds
For a 7-year-old, keep the drills simple and short.
Try:
- Target cones — knock over or hit designated targets.
- Dribble and shoot — take a few touches before finishing.
- Pass and shoot — receive a simple pass and shoot.
- Two-foot challenge — alternate between the right and left foot.
- Goal-zone game — award points for different target areas.
Keep the focus on accurate contact, balance, and enjoyment.
Soccer Shooting Drills for 10-Year-Olds
At around this age, players can begin adding more movement and decision-making.
Useful drills include:
- Receive and shoot
- Turn and shoot
- One-touch finishing
- Dribble around a cone and shoot
- Shooting after a diagonal run
- Weak-foot finishing
- Moving-ball target shooting
- Small-sided finishing games
The objective is to gradually connect shooting technique with realistic match situations.
Soccer Shooting Drills for U8, U10, and U12 Players
The same basic shooting principles apply across youth age groups, but the difficulty can be adjusted.
U8
Emphasize:
- Basic striking
- Balance
- Support-foot placement
- Both feet
- Simple targets
U10
Add:
- Moving passes
- One-touch finishing
- Different shooting angles
- Dribbling before shooting
- Simple decision-making
U12
Introduce:
- Faster passes
- First-time finishing
- Pressure from defenders
- Finishing after movement
- Different shooting techniques
- More realistic match scenarios
Team Soccer Shooting Drills
Team shooting sessions can combine finishing with passing and movement.
Examples include:
Pass-and-Finish Rotation
Players pass through a sequence before the final player shoots.
Crossing and Finishing
Players attack crosses or wide passes and attempt to finish.
Combination Play and Shot
Two or more players combine before the final shot.
Small-Sided Finishing Game
Create a small-sided game where players receive additional rewards for shots on target or quick finishes.
Team drills help players understand that shooting is often the final part of a larger attacking sequence.
Soccer Shooting Games
Shooting games can make repetitive practice more engaging.
Try:
- Corner challenge: score into specific corners.
- Target challenge: hit cones or marked zones.
- Points game: different areas of the goal have different point values.
- Weak-foot challenge: only use the weaker foot.
- First-time challenge: finish without taking a controlling touch.
- Accuracy competition: count shots on target rather than only goals.
These games can improve accuracy while keeping training competitive and enjoyable.
Soccer Shooting Targets
A soccer shooting target can be anything that gives the player a specific area to aim for.
Examples include:
- Corner targets
- Goal-zone targets
- Cones
- Target sheets
- Small portable targets
- Marked areas of the net
Target practice is useful because it changes shooting from simply “kick the ball at the goal” into a more precise skill.
Soccer Shooting Net
A soccer shooting net or rebounder can be useful for individual training.
Depending on the design, it can help with:
- Repeated shooting
- Rebound practice
- First-time finishing
- Ball control
- Passing
- Practicing without a goalkeeper
When training alone, a rebound net can make it easier to get multiple repetitions without needing another player.
Soccer Shooting Machine
A soccer shooting machine can repeatedly deliver balls at different speeds, angles, or trajectories.
It can be useful for advanced repetition because the player can practice:
- First-time shots
- Volleys
- Half-volleys
- Finishing from crosses
- Reaction shooting
- Different receiving angles
However, equipment should support good technique rather than replace it. Beginners should first understand basic shooting mechanics before relying heavily on high-speed repetitions.
How to Shoot a Soccer Ball Without a Goal
You do not need a full-size goal to practice shooting technique.
You can use:
- Cones as target areas
- Small portable goals
- Marked target zones
- Rebound nets
- A safe open training area
Instead of aiming at an actual goal, choose a specific target and focus on clean contact.
For example, place two cones several feet apart and practice sending the ball through the gap.
Common Soccer Shooting Mistakes
Trying to Kick Too Hard
Maximum power is not always necessary.
Fix: Build accuracy first, then gradually increase power.
Planting the Support Foot Too Far Away
This can make balance and clean contact more difficult.
Fix: Start with the support foot approximately 6–10 inches from the ball for a basic stationary power shot and adjust from there.
Planting Too Close
If the support foot crowds the ball, the kicking leg may not have enough room to swing naturally.
Fix: Create enough space for a comfortable swing.
Looking Up During Contact
Looking at the target too late can cause inconsistent contact.
Fix: Check the target before the final movement, then focus on the ball during contact.
Leaning Too Far Back
This can contribute to a higher-than-intended shot.
Fix: For a basic driven shot, keep your upper body controlled and relatively over the ball.
Using the Wrong Part of the Foot
Different shots require different contact surfaces.
Fix: Match the striking surface to the intended shot.
Ignoring the Follow-Through
Stopping the leg immediately after contact can make the movement feel restricted.
Fix: Allow the leg to continue naturally after the ball is struck.
How Long Does It Take to Get Better at Shooting?
Improvement depends on training frequency, current skill level, technique, and the quality of practice.
Consistent short sessions can be more useful than occasional long sessions.
A simple practice structure could include:
- 5 minutes: basic ball striking
- 10 minutes: accuracy
- 10 minutes: power and technique
- 10 minutes: moving-ball finishing
- 5 minutes: weaker foot
As technique improves, increase the difficulty rather than simply increasing the number of shots.
Soccer Shooting Training Plan
A simple individual session can follow this progression:
Phase 1: Technique
Practice stationary shots with controlled power.
Phase 2: Accuracy
Choose specific target areas.
Phase 3: Movement
Add dribbling, passing, and changing angles.
Phase 4: Pressure
Add time limits, defenders, or competitive scoring.
Phase 5: Match Situations
Practice first-time finishes, rebounds, volleys, and shots after movement.
This progression moves from isolated technique toward realistic game situations.
Frequently Asked Questions About Soccer Shooting
Approach the ball under control, place your support foot beside it, keep your body balanced, strike with the appropriate part of your foot, and follow through toward the intended target.
Use a controlled approach, stable support-foot placement, a firm kicking ankle, clean instep contact, coordinated leg and hip movement, and a natural follow-through.
Choose your target before the strike, use a stable support foot, make controlled contact, and practice placing the ball into specific areas of the goal.
For power, the instep/laces area is commonly used. For controlled placement, the inside of the foot is useful. Other techniques use the outside or other parts of the foot depending on the desired result.
Common techniques include instep power shots, inside-foot placement, curled shots, outside-foot shots, chips, volleys, half-volleys, first-time shots, and toe-poke finishes.
Focus on technique rather than simply trying to swing harder. A stable support foot, firm ankle, clean contact, coordinated body movement, and follow-through all contribute to effective power.
Practice specific targets rather than simply shooting at the goal. Start with controlled power and gradually increase speed while maintaining accuracy.
There is no single distance that works for every shot. For a basic stationary shot, approximately 6–10 inches (15–25 cm) beside the ball is a useful starting point.
For many basic shots, the support foot generally points toward the intended target. However, the exact angle changes according to the shooting technique, approach, and ball position.
Yes. Cones, marked target areas, portable targets, rebound nets, and other safe training setups can be used to practice accuracy and striking technique.
Final Takeaway
Effective soccer shooting comes from combining accuracy, power, balance, timing, body position, and clean ball contact.
Start with the fundamentals:
Approach → Support foot → Body position → Contact → Follow-through
For a basic shot, begin with the support foot approximately 6–10 inches (15–25 cm) beside the ball, with the toes generally oriented toward the intended target. From there, adjust the distance and angle according to the type of shot.
Once the basic movement becomes consistent, practice different techniques such as power shots, placement finishes, curled shots, chips, volleys, and first-time finishes. The goal is not simply to kick the ball harder. It is to develop the ability to choose the right technique and execute it accurately under different game situations